jueves, 28 de mayo de 2020

New origami projects!

Hi everyone!

Today we are pleased to show you two different origami figures. Do you remember the butterflies we made some weeks ago?

You can choose wich one of these two figures you prefer to do, or even do both if you feel inspired enough!

To do so you only need A SQUARE OF PAPER OF THE SIZE YOU PREFER, but it's better if you do it with a large square of paper.

Also, it looks prettier if you use a colored paper or if you decorate it once you have finished.

FIRST FIGURE: ORIGAMI RABBIT


SECOND FIGURE: ORIGAMI DINOSAUR


Remember to STOP THE VIDEO IN EVERY STEP, SO YOU DON'T GET LOST.

Enjoy!!

jueves, 21 de mayo de 2020

A city skyline with chalk

Hello there!

Today we bring you a new task that can result as amazing as this:

chalk skyline. (no instructions, just photo) create a skyline ...


To create this spectacular skyline you will need:

- Dark color card stock (dark blue, black, gray ...)
If you do not have card stock, you can use the inside of a cereal box, for example.

- Chalks of various colors. It could be done with white chalk, but it doesn't look that good.

- Scissors.

- A pencil.

The process is as it follows:

1. We draw the outline of the city with a pencil on card stock. We cut it.


2. We paint with chalk the top and sides of all buildings.


3. We place the template on top of the black card stock and begin to spread the chalk with our fingers.


4. We place the template on various parts of the card stock and repeat the previous step.


5. We add the windows of the buildings and the stars with a white chalk.


You can be creative and create other designs, like this landscape:


We hope to see your creations soon!
Sergio and Lucia.

Pictures from Maureen L. White.

jueves, 14 de mayo de 2020

Crafting a 3D cube

Hello everyone!

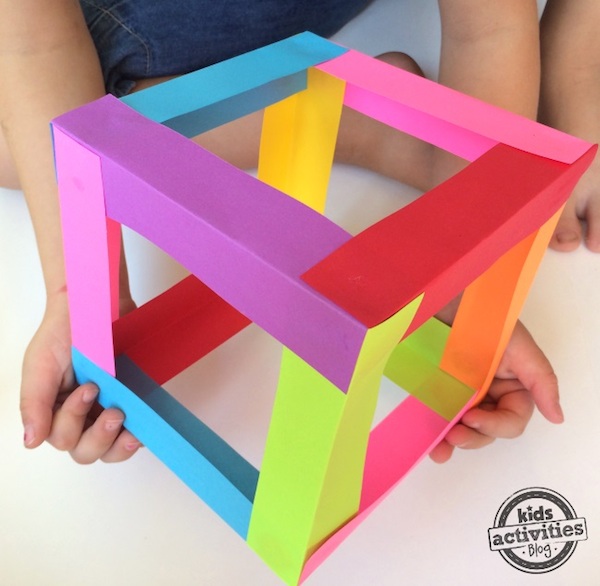
Today we propose you a very simple craft: build a cube using colored cardboard. The result is this:

Manualidades con papel


To make this craft we need:
- Cardboard or colored paper.
- Scissors.
- Glue.

Optionally:
- Crayons, markers and other materials to decorate.


Steps:

1. We cut twelve strips of cardboard of different colors OF THE SAME SIZE EXACTLY. You can choose the size, but remember that the strips must be rectangular.

2. If you already have the colored strips cut out, fold the strips at a right angle (90º).

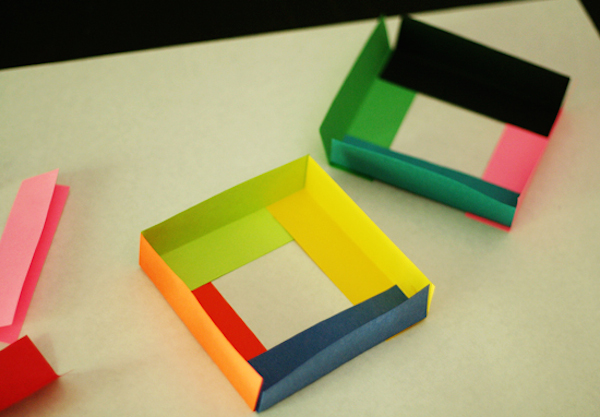
3. We begin to mount the base of our cube, placing the strips one on top of the other. It has to look like this:

Manualidades infantiles con papel

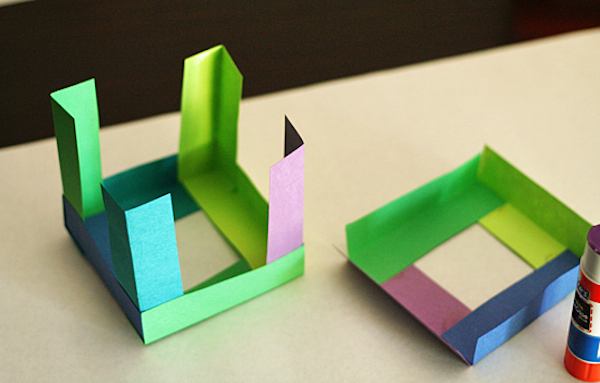
4. We place the strips forming columns above the vertices of the base that we have just made:

Cubos de papel

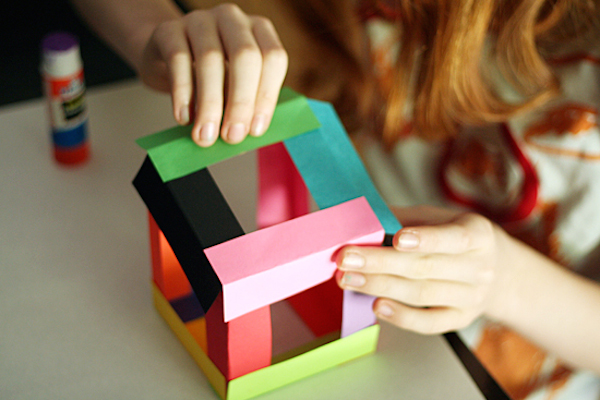
5. We create another base equal to that of step 3 and paste it on the columns we just made:

Manualidades con papel

You have already finished your cube! You can create several cubes of different sizes and colors and decorate them as you want.

Font: www.pequeocio.com

Best regards,
Sergio and Lucía.

jueves, 7 de mayo de 2020

A collage with recicled materials

Hello everyone!

This week we propose a new task with which you can be very creative: a collage.

What is a collage? A collage is an artistic technique that involves using pieces of colored paper to create a composition.

With this technique we can create as amazing results as these examples:


To make your own collage, you will need these MATERIALS:

- Old magazines, newspapers or supermarket brochures.
- Optionally, colored paper.
- A glue stick.
- Scissors.
- A good idea :)

The procedure is this:

1. We think about the theme of our collage. It could be an animal, a landscape, a portrait... It's up to you and your imagination!


2. We cut with scissors or with our hands all the bits of the paper that we need from the magazine or newspaper.


3. We place them on the paper or cardboard where we will compose our collage.


4. When we are happy with the design, we paste them. And that's it!


Retrato con papelitos tipo mosaico | Arte elemental, Niños ...


We hope you try this activity and show your results to us!

Best regards,
Sergio and Lucia.